Mike Beech
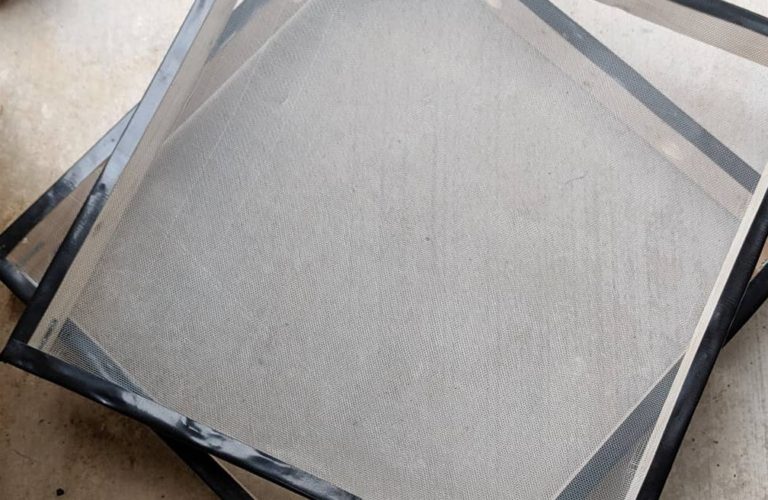
What You Came For:
Supplies
- 10 ft. of 1×3 or 1×4 Pine Board
- 8 Corner Braces w/ Screws
- Window Screen (I used metal, there are other materials available)
- Gorilla Tape
Tools
- Staple Gun & Staples (5/16″ depth is plenty)
- 1-1/2″ Drill Bit for Boring Wood
- Cordless Drill
Show of hands: How many of you start growing an herb garden with the best of intentions, but end up never really harvesting anything significant from it, and instead watch it slowly brown and die as summer comes?
You can’t see it, but all of us here at Now You Try have our hands held high.
What changed things for me personally was learning to store and preserve my herbs like I have been with other food. Most of the popular herbs you will cook with (parsley, sage, rosemary, thyme, dill, etc) will maintain their excellent flavors when dried. I started drying them by simply hanging them upside down, and while this worked just fine, it took up a lot of space, made a mess as leaves shed, and was a general pain. It just managed to tilt into the “not worth it” space in terms of time and effort put in versus what I got out.

Luckily, I was able marry my love of woodworking, flavorful food, and using up excess building material into a project that solved the drying problem once and for all. I built an herb drying rack.
The drying rack design gives you the advantage of being able to dry big bunches of herbs all at once, well not resting them directly on a surface where they can trap moisture and all sorts of undesirable visitors can hide. Plus, stained counters from silly little herbs are a thing. The rack is also something you can safely keep outdoors without worrying about bugs or critters raiding your stash.
Construction
The frame construction is incredibly simple. I cross cut the pine boards into eight 14-inch sections. Instead of worrying about cutting any angles for the corners, I simply used an arrangement of overlapping each piece. I created two identical square frames, and fastened them with corner braces on the inside of each corner.

Because air flowing through the rack is what does the work of drying, you want to elevate the bottom of the rack with some feet. Again, keeping with simplicity as the theme, I cut some 1.5 in. Long sections from my leftover wood, and attach those at the four corners to get the job done.


To maximize airflow, I also chose to use a 1.5″ Forstner bit (but any similar-sized bit would be fine) to cut two holes in each side of the bottom frame. Air flow from the top of the rack won’t be much of an issue, but on the side sitting on a concrete countertop, I figured the more places for air to get in and out, the better. Also note: if you are smart, you will do this step before you assemble the frames. If you are more like…me… you will wait until after it’s built.
The addition of the screens was only slightly more challenging. Cut two pieces of screen that extend roughly 1/2″ to 1 inch beyond the opening of the frames. Don’t be afraid to leave too much, you can always try it down. Staple one entire side into the edge of the frame, then stretch the screen and do the opposite side. Repeat for the remaining two sides and make sure to stretch tight every time. Do the same for the bottom frame, obviously.
For safety and aesthetic appeal, I added a piece of Gorilla Tape to every edge. Depending on what screen material you use, the tape may not hold forever. For that reason, I also recommend going back over with a few staples into the Gorilla Tape to hold it in place. if I were to do the project over, I may get a little more experimental with edging materials here and see what I could do. Maybe foam weather stripping or something similar?
We have already found a lot of uses for the drying rack. Obviously we dry herbs, but I also use it to dry yaupon leaves for tea, and right now we are actually giving a go at making our own sun dried tomatoes. It’s just nice to be able to put things out to dry and not have to worry so much about multi-legged invaders.